Introduction
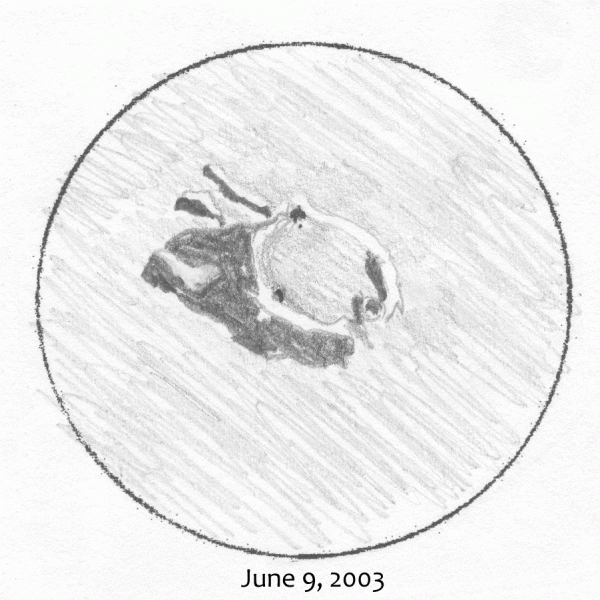
On a beautiful summer evening in 2003, crater Capuanus drifted into the eyepiece, and looked so lovely that I decided to try something entirely new―sketching. It was quite frustrating at first―I'd never had art lessons, so it was necessary to figure things out for myself. As time passed though, I developed this intuitive step-by-step technique, which has helped a lot of people throughout the years―I'm sure it will help you too.
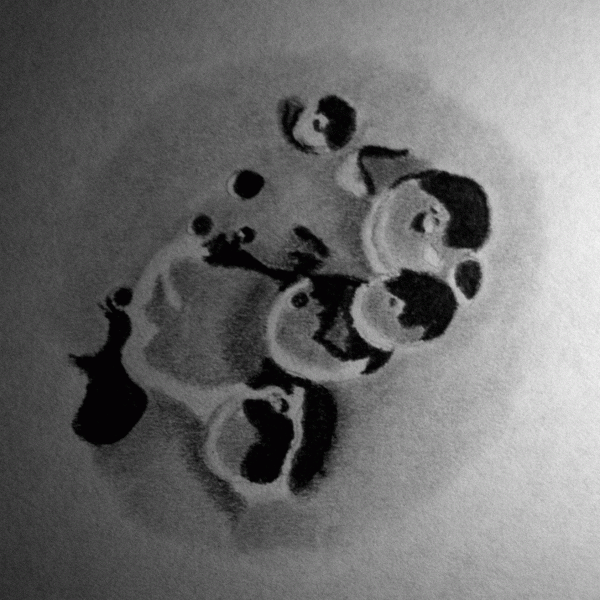
The crater group depicted is located east of Tycho, and includes craters Orontius, Sassure, Huggins, Nasireddin, and Miller. The sketch was made at the eyepiece on 2005 July 14th, and its progress was recorded with a digital camera. It was begun at 20:45 (just before sunset) and was finished an hour later at 21:45. The first two images were taken with sufficient daylight, but the last three required a hand-held light―that's why they vary so much regarding brightness, and overall illumination.
To make things less intimidating at first, you might feel more comfortable practicing from the sketches shown here, or from lunar images. And don't give up. You didn't give up when learning to walk, tie your shoes, or ride a bike, so don't do it with sketching. Remember, the goal of eyepiece sketching is to record your observation―not to create a pretty picture. Just learn the technique, practice it, and trust in yourself. You'll be amazed at the results.
LUNAR SKETCHING TUTORIAL
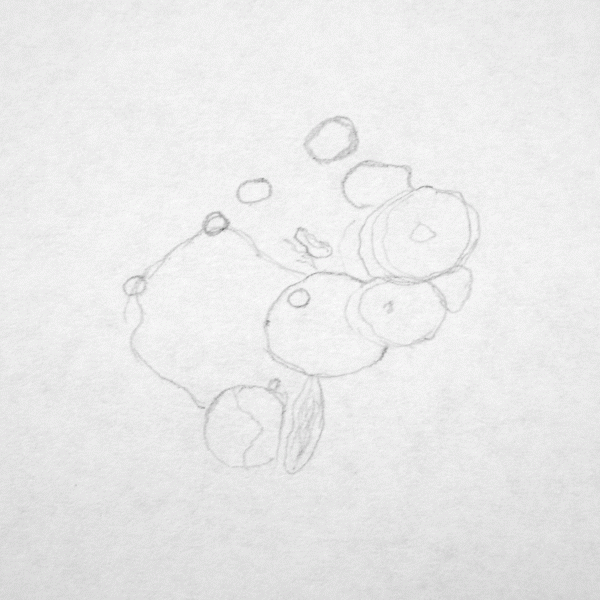
Using a B pencil and a light touch, roughly outline the main features, except for the shadowline - that's in the next step. For now, concentrate on the crater outlines, central peaks, the borders between crater floors and their internal walls, and any other borders between different shades of grey. Also include any terracing slopes you might see on the inside walls of the craters. This is the foundation of your sketch, so take your time.
The terminator crawls along the Moon's equator at 1/2 lunar degree per hour, and shadowlines are constantly on the move. That's why it's important to use an 8B pencil and 'lock' your shadows now. Locking your shadows will prevent confusion during the rest of the sketch as the shadows drift along. For best results, try to complete this step in about 10 minutes or so. When you're done, notice the depth that the shadows added to your sketch.
Using a 2B pencil, lightly shade the crater floors by laying your pencil nearly horizontal to the paper and gently rubbing the flat side of the exposed graphite on it.
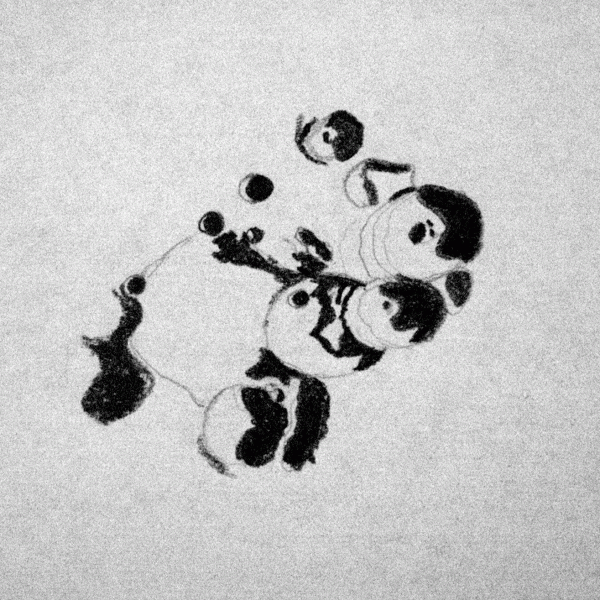
To blend the crater floors, use small circular motions with a blending tool (tortillon or blending stump). You'll notice that the blending process creates a soft look. This is because the blending tool is pushing the graphite from the surface of the paper into its 'tooth' or texture.
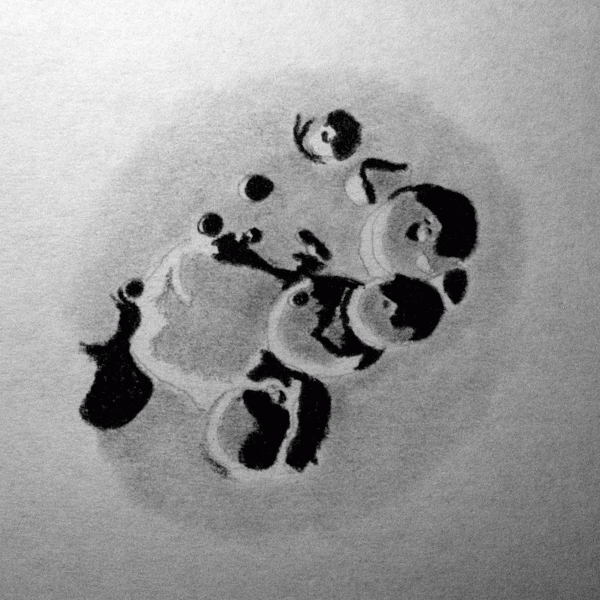
With the same technique and pencil used to draw the crater floors in Step 3, frame the crater group with a 'halo' and blend it the same way you blended the crater floors. Be very careful not to pull any of the 8B graphite into this outer area. If it accidentally happens though, work the tip of the kneadable eraser to a point and dab the 8B graphite off of the area.
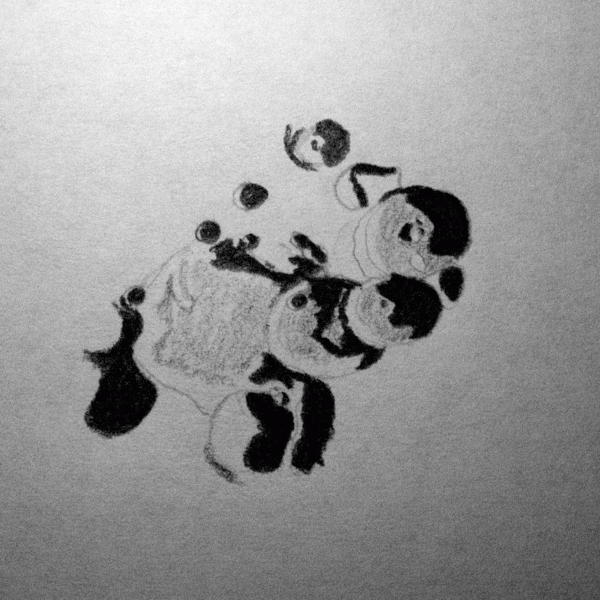
In this step you'll be 1) blending border lines, 2) creating more depth, and 3) adding outer rim shadows:
- First, blend the inner terrace slope lines drawn in step one, use circular motions with the tip of a small, clean blending tool. The best way to clean blending tools is by dragging them across sandpaper or an emery board;
- Look at the vertical oval shadow on the right side of the bottom crater in Step 4, and notice how flat it looks. Now look at the same area in Step 5 and you'll see that it appears to be sloping. To create this sloping illusion, simply pull some of the darker graphite into the lighter area with the blending tool;
- The craters illustrated here are sunlit from the right side, which means their elevated rims are casting slight shadows on their left outer slopes. To illustrate these shadows, you need to slightly darken the sloped area. This is easily done by applying a very light amount of 2B graphite to the sloped area, using the technique in Step 3. Then with a clean blending tool, use small circular motions to blend the graphite and create the slope.
More Techniques
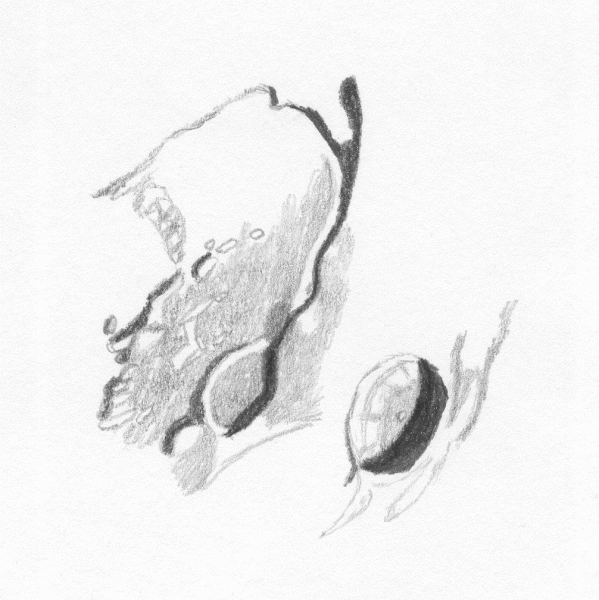
You can also record your observations by drawing a 'study'. It's a simple line drawing which is very useful when you don't have a lot of time, and as you can see, it's also quite effective in capturing details.
To wrap things up, I thought you might get a kick out of seeing the sketch of Capuanus that started me on this absolutely incredible journey so many years ago.
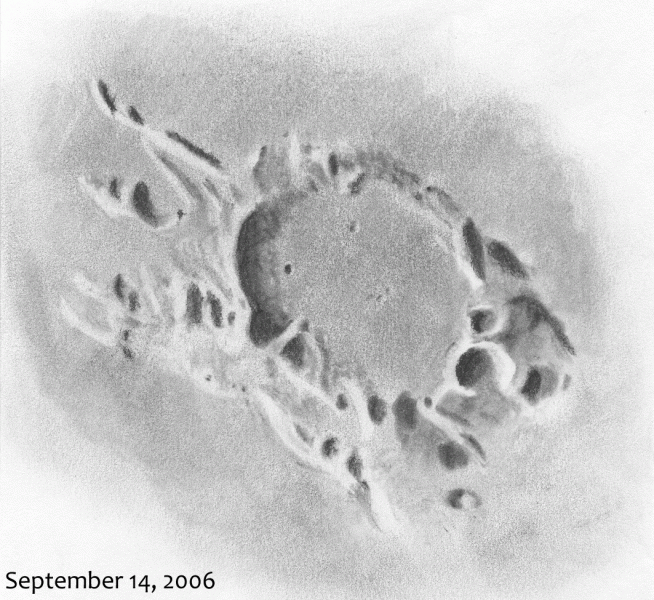
Also shown is the same crater, done a few years later. Remember, I'm not an artist―all it took was practice.
Clear Skies!
Art Materials
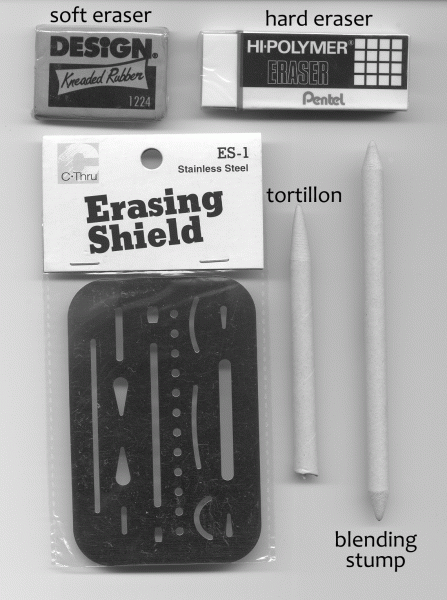
Erasers I recommend that you purchase art erasers because they're gentler than common ones are. You'll need two kinds: a hard one and a soft one. The hard one is white and often referred to as 'plastic' or 'vinyl'. The soft one is grey and kneadable like putty. You can usually find them wherever pens and pencils are sold, and they're also available at art supply stores or craft/hobby shops.
The vinyl eraser is basically used to remove light lines and stray pencil marks (much as you'd use a common eraser) and is also used as a deep cleaner. The most common use for the soft eraser is to 'dab' graphite from a solidly filled area before deep cleaning it with the hard eraser. It's very important that you dab off as much graphite as possible because (as i'll explain in a bit), there is oil or wax in the graphite. If you use the hard eraser first, the graphite will smear quite readily and create a real mess. The soft eraser can also be squeezed into a flat edge and used to lighten the sunlit side of lunar crater rims, rilles, faults, or wrinkle ridges (those vein-like worms in lunar maria). It can also be used in deep sky sketches, or any other type of astrosketch. To refresh the soft eraser, stretch and fold it like taffy. The graphite will be worked into the eraser's interior, providing you with a clean surface to work with.
Paper To be perfectly honest i have no idea what type of art paper to recommend―I've always used common computer paper and it works just fine.
Pencils Art pencils are made from graphite, clay, water and salt. When the mix contains more clay than graphite, the pencil is considered 'hard' (H) and produces lighter values. When the mix contains more graphite than clay, the pencil is considered 'soft' (B) and produces darker values. There's also an HB pencil that contains equal parts of clay and graphite―that's what the common #2 school pencil is.
After being mixed in the proper proportion according to how hard or soft the pencil will be, the material is formed into spaghetti-like strings and kiln-fired. Then it's dipped into oil or liquid wax that soaks into the tiny pores of the product, resulting in a smoother application when being used. This wax/oil will cause the graphite to smear if you touch it, so use caution while sketching.
The pencils are labelled with letters (H or B) and numbers to indicate their hardness or softness. The higher the number, the harder or softer the pencil. Here's the scale, from hardest to softest: 9H, 8H, 7H, 6H, 5H, 4H, 3H, 2H, H, HB, B, 2B, 3B, 4B, 5B, 6B, 7B, 8B, 9B. As you can see, there's quite a wide variety but you'll probably only need a few because they produce a surprising range of grey shades, depending on how hard you press. For lunar sketches, I use 8B, 4B, 2B and HB. For everything else, I use the three middle ones―H, HB and B.
Blending Tools
There are two kinds of blending tools: a Tortillon and a Blending Stump―both made from tightly rolled paper and avaiulable in a variety of sizes. The Tortillon is only pointed on one end, and you can easily see the layers of paper it's made from. The Blending Stump is pointed at both ends and is rolled tighter than the Tortillon is.
Blending tools are used to gently rub graphite into the tooth of the paper to produce a soft, foggy look. You can also coat their tips with graphite and use them to draw nebulosities or entire lunar sketches. The best way to clean them is by running them across sandpaper or an emery board.
Eraser Shield
This handy little item is usually found in the drafting area of an art supply store―it's a credit-card sized piece of thin metal with various shapes punched out of it. To use it, choose an opening which best matches the size and shape of what you need to erase, and then place the opening over the area to be erased. As its name implies, the metal 'shields' the surrounding area while allowing you to quite vigorously erase what's needed.
More on Lunar Sketching
1. Lunar Sketching, Raymond R. Thompson (Toronto), JRASC 56, 189 (1962).
2. Observing and Drawing the Moon (Astronomy Toronto, Episode 31)
Amateur astronomer Jillian Buriak discusses with host Randy Attwood her interests in observing and drawing the Moon. (February 1985, 30 minutes)
| Attachment | Size |
|---|---|
| 646.01 KB |
- Log in to post comments